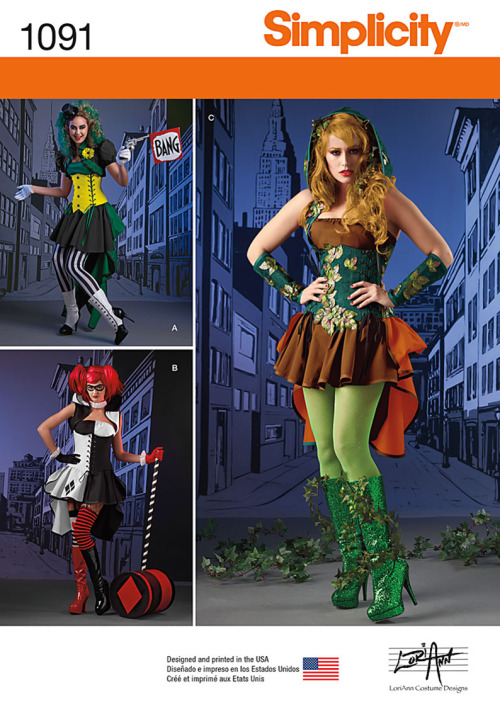
I started working last weekend on the Harley Quinn version of this costume for my friend. This post is mostly just an update on the progress plus a mini review. I purchased all the materials for the project for about $50 at Joann Fabrics.
The skirt is the same pattern as the Poison Ivy version with the skirt cut from two different fabrics instead of one. I sewed it together with french seams and then made the casing for the elastic and put the bias tape hem on. With regards to cutting the elastic I recommend not using the elastic casing guide provided and just using yourself or your subject as the guide. I measured the elastic on the top and bottom using it and it was too large for my friend. I just wrapped the elastic around her waist and took a rough measurement and marked it with a pin. Then I fed the elastic through the casing and had her try it on. I still had to shrink both the top and skirt down so they were not falling off of her.
Speaking of the elastic, the elastic casing on the skirt is the bane of my existence. Well at least its not my favorite part to iron and pin and sew. The curvy parts right after the straights want to gather and pucker and make me mad. I get it all done, but it is a time consuming process. At least for the 3/4" folded piece. When you have to fold the edge to 1/4" it goes by much nicer and easier. However, I love this skirt. I love the length and shape.
For the appliques on the skirt I used regular felt instead of the fusible kind. I cut them out according to the pattern and drew out their placement on the skirt. Then I pinned them down and sewed very close to the edge. I only used regular felt because that's what I already had on hand. I think it still looks really nice and works. If you don't want to see stitching lines then I suggest using the recommended felt.


The top was the quickest thing to put together. It is just two rectangles sewn together with a narrow hem and a 1/2" wide elastic casing at the top. As with everything else I used french seams to sew the pieces together. Since the top has different colors, I changed thread while sewing the hem and casing to match each section. I did this with all three pieces for this costume.


Next up will the the shrug/hood for this costume.
Thank you for reading and have a great day!
No comments:
Post a Comment