Monday, July 20, 2015

Simplicity 1091 Part 2 - Poison Ivy Underbust Corset


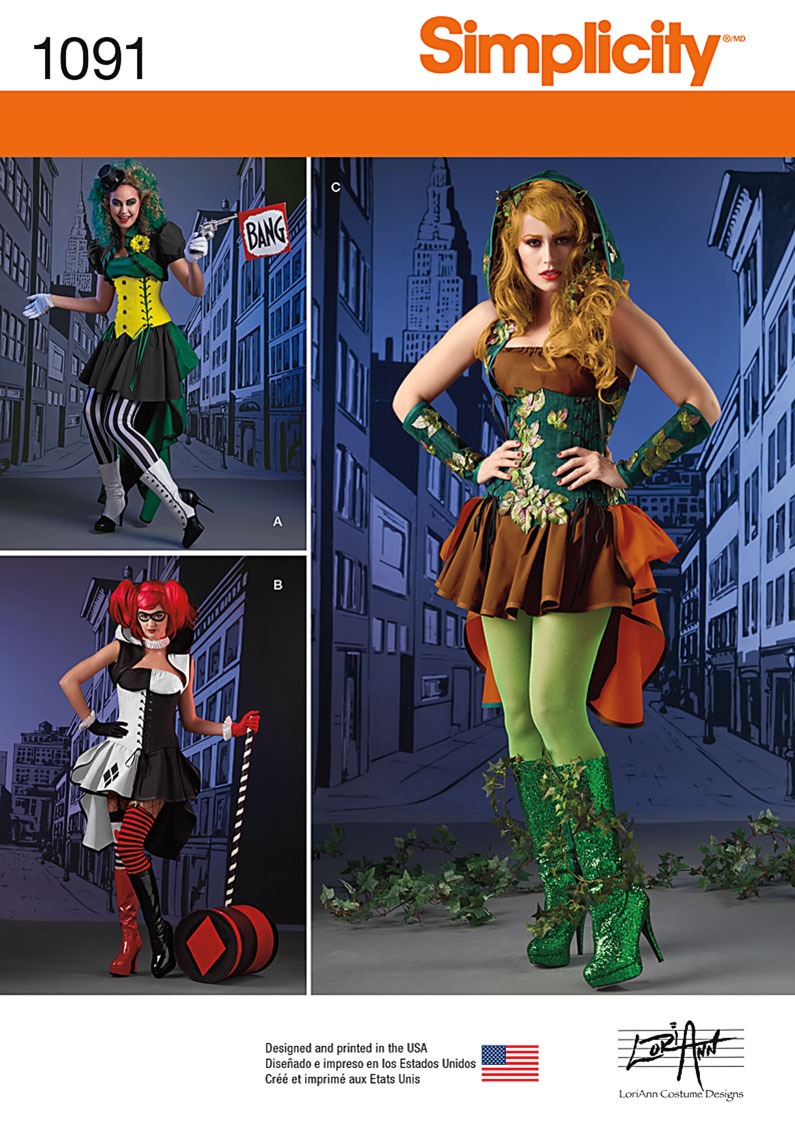
After about a week worth of work the corset is finally finished. I love this corset. I love the fit, the style, and the amount of support from the boning. The construction was easy enough but the finishing was more aggravating than it should be. I will be going through my process of making this and the thoughts I had about the corset construction and instructions from the pattern. This corset is made using the Simplicity 1091 pattern by Loriann Costume Designs.

I cut out all the required pattern pieces beforehand. After an annoying and disastrous attempt at making the gauntlets I decided to focus on making the corset instead. One of the main things that was wrong with the gauntlets that would carry over to this corset was that the material was not thick enough for the grommets. The one piece of canvas lining and then the outside fabric was not enough make a good close with the grommets I was using. So to fix this I cut out a second layer of canvas to add.


This image is of the center piece after I sewed around all the edges but the top and then clipped the edges and corners and added notches on the curves. I turned the piece right side out and pressed it. After that I drew out all the boning channels. The boning I used was industrial zip ties. They are cheaper and work well for what I want. They are, however, slightly larger than the 1/4" boning that is required. This caused me to adjust the boning channels widths to fit them. It was not a problem but it did take longer than just copying the lines from the pattern.


Once they were drawn on I sewed all the boning channels down. And made adjustments for the grommet placing. That also brings up another point about this costume. The required grommets are HUGE. There was no way I was going to put those on my piece. I looked at the grommets compared to the piece and there was barely any space to fit them. So I opted to use smaller grommets which in my opinion would look better than huge holes in the corset.

I added boning by measuring out how much I needed and then trimming them own 1/2 an inch. This brings me to my most enraging aspect of this costume. The bias tape trim. Why oh why did they choose 1/2" That is huge! At least for the edges. I did not like this look. And the way that they describe it is worse. It made no sense in my head or how I was supposed to install it.

Step 9 says to baste the top edge down. It doesn't say how far. But if I went as far as the seam allowance I would have run into a grommet placement. So I went 1/8th from the edge just to close it. Its the only thing that made sense. It says to cut down the seam allowance but doesn't say how much and if I did I would have run into the same issues with the grommet. So I just left the seam and didn't cut it.

Step 10 says to iron bias tape flat and then in half. Then step 11 say to pin 1/4" from the top and sew on. It again doesn't give a seam allowance. I tried to see how it would look by guessing and the bias tape would be so thick of a band it didn't look good. Just trying to explain how this wasn't working is getting me all frustrated again.

So I improvised. I placed the edge 1/8" from the edge of the corset and then sewed it down just before it reached the boning using a zipper foot to make sure I didn't hit any of it by accident. Then I ironed it flat and understitched close to the edge. Since there was so much of the tape left over I ironed it in half where the raw edge met the raw edge of the corset piece and then folded it again to meet the line of stitching on the back side. This way I could ladder stitch/whip stitch the bias tape to the back.

I got better pictures of the sides for the next few pictures than the middle so they will be used as the example on how I "fixed" the bias tape issue.

Pinning the bias tape down 1/8" from the top.
After being top stitched and folded over it looked like this. I didn't want this big of a band!


So I folded it over to make the edge smaller and then folded it down to meet the stitching lines.
When sewn down it creates a much more pleasing accent line.
After I was finished with the corset middle I started on the sides. They came together pretty easy and had only the same problems with the bias tape that the previous section did.

Once the bias tape was all sewn on I worked on the grommets. I had to move the placement of the grommets because they would not fit where their original placement was. There was an inch gap between the edge boning and the piece was was to be 1 1/4 (1 1/2 for my measurements) from the edge so I placed the dots for the grommets on the same level as the old placement but put them halfway between the 2 pieces of boning. Once I expanded the holes to fit the grommet I used an anvil and my grommet setter to hammer the pieces together. Pro Tip: An anvil is WAY better to use than the floor or table. The grommets I did before looked like crap compared to the ones I did for this corset.

I laced everything together and it fit perfectly. I wish I had made it in a smaller size just because it is too close to my actual measurements and if I were to loose any weight it wouldn't fit anymore.

Overall my complaints about the construction are easily modifiable. But to sum them up:
-The grommet size suggested is too large
-The bias tape should be smaller
-The directions on applying bias tape need to be clearer
-I think its weird that the pattern wants bias tape on the top of the center piece but on the bottom of the edge pieces. Be consistent.
-Two layers of canvas are superior to just the one suggested.
- The placement of the grommets originally should have been further set back. If I had not used 1/2" boning channels and used the 1/4" as suggested it still would have put the grommets bumping right next to the boning.

Despite all those things I do plan on making this again for possibly a Green Arrow costume. 

Anyways here are finished pictures of the corset. Once the whole thing is together I will figure out leaf placement as I said before. And don't mind the white streak on the center piece. I tried to erase a line I drew and I guess the eraser on the pencil was bad and left a white mark that won't come out til I really work on it.


Part 1, which is making the hood, can be read here and part 3, making the bustle, can be read here.

Thanks for reading!!

Monday, July 13, 2015

Simplicity 1091 Part 1 - Poison Ivy Hood


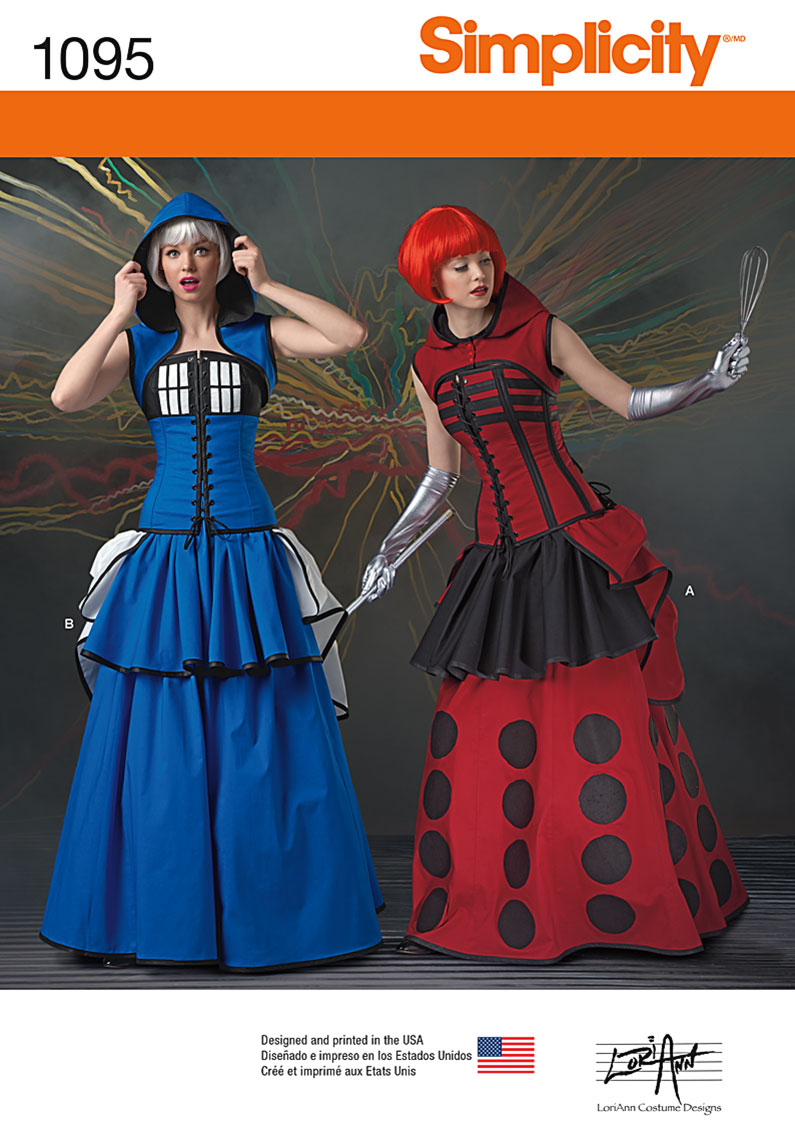
Simplicity just came out with some amazing new patterns! I was so excited I grabbed them as soon as I saw them. I mostly wanted them for the pieces and not the overall costume. Since I'm not a pattern drafter I could use the pieces to build on for future costumes. I loved the particular corset style of the Lori Ann patterns (Dalek/Tardis and DC Comics Villaness). They are long in the torso and that is exactly what I wanted.

The more I looked at the patterns the more I actually fell in love with the Poison Ivy costume. I was thinking of making a steampunk outfit using a mix of the Dalek corset and Joker outfit but I have a special bond with red headed characters and couldn't get the idea out of my head.

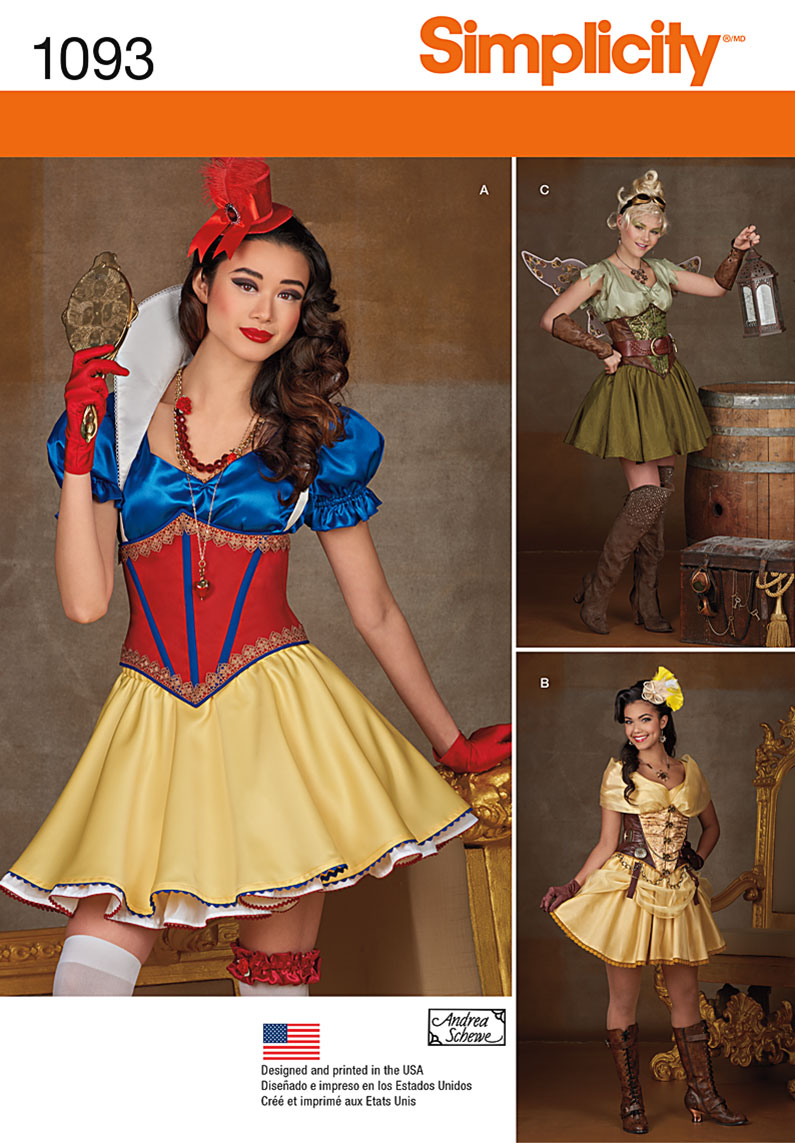
I chose to make the costume more similar to Lori Ann's color scheme than the colors on the package. I also didn't like the top that came in the packaging. I plan to use the Snow White top in the Simplicity 1093 pattern with some sleeve alterations.

My local Joann's was closed for the weekend due to a water leak so I drove to Hancock Fabrics to get my supplies. This turned out better because I was able to go by Hobby Lobby and get some grommets (I'll need 70 of them!). They have a better selection than just gold or silver. I also like the Royalty Broadcloth from HF better because it is softer and I don't see as many imperfections in the weave like I do with the broadcloth that's about the same price at Joann's.

For the hood I used hunter green twill, black canvas, and red broadcloth. I ironed all the fabric and cut out the pieces.

I sewed together the lining first and ironed flat the seam and made markings for folding the pleats.


I did the same with the green twill and attached the two pieces together. I formed the pleats and tacked them down and then sewed on the bias tape for the hood opening.


Next I assembled the hood band which will connect to the corset later. I sandwiched some canvas between the two strips of red and green and basted all the edges. On the lower edge that doesn't connect to the hood I sewed bias tape. Then I matched the notches on the hood and the band and basted the two pieces together. Bias tape was then sewn over the remaining edge and it was finished!


The grommets should be installed at this point but I don't want to put them in until I have the corset finished and can accurately gauge where they need to go. I might need the strap shorter or just raise the grommet placement and tuck the strap into the corset. 

I will have photos of it worn and the complete costume when I finish it. But for now enjoy Betty modeling it for me. She is also modeling the Dalek corset mockup.


The hood reminds me of a venus fly trap. I will be adding leaves as embellishments later once the costume is fully complete. 

For part 2 click here!

Friday, June 19, 2015

Flower Skirt

This skirt has been a WIP for about a year now. It started as a dress from the Simplicity 1755 pattern. I had cut all my fabric out in the wrong size and was devastated that I had wasted such nice fabric until I had a bright idea. I would take the skirt, which was supposed to be pleated, and gather the fabric to make a dirndl skirt.

I had already attached the pockets and sides all together except for the back. All I needed to do was to gather the skirt, install a zipper, make a waistband, and hem.

I installed the zipper by sewing the two back pieces together and then laying the zipper in the seam and sewing it down. Then I ripped the seam to expose the zipper. I didn't have an invisible zipper and figured it wouldn't look too bad this way. 

I made the waistband from two rectangles cut to a few inches past my waist measurement to make the tab for the button. I interfaced one side and ironed down one side of the other to match my seam allowance. I sewed these two pieces together and turned it right side out and ironed it to make a crisp edge. I gathered the skirt and pinned it to the waistband and sewed it on. The side that was ironed to the seam allowance was then whip stitched to the skirt.

Next I sewed the button hole on my skirt tab and then installed the button. I don't know why I used grey thread to sew the button on. I think my thought was that "the whole rest of the skirt was sewn with grey thread". I probably will change it at some point.

When all that was done I hemmed the skirt by pressing over 1/4" and then 1/2" of the hem.


Monday, May 18, 2015

Winter Project Recap

Pretty late on this seeing it is May already. But I've been pretty busy and didn't have time to update or stop and breathe after loading so many projects that needed to get done on my plate. Plus school started back up and it has been the heaviest workload yet.

I had 3 projects that needed to be completed before or just after Christmas and only a few weeks to do them. I have no idea what I was thinking taking on a knitting project and 2 sewing projects at the same time.

Knit Blanket:

The first project that I actually started in November, but had to put down due to finals, was a chevron knit blanket for my cousin's baby that was due in February. Her shower, however, was on January 3rd. I had made a huge amount of progress in the few weeks I had worked on it in November so I figured it would get done way faster than it did. After finals though, my speed halved and I was barely making it through a colored section a day. I used a pattern that I am currently using to make a huge "average person" sized blanket. I got the pattern from Ravelry and it was pretty easy to follow and it's a very fun pattern. The colors were ones I had from wanting to make a baby blanket before but never finished. I unraveled that and restarted on this blanket. The yarn I used was Bernat Baby Soft yarn in pink, yellow, and mint.


Quilted Blanket: 

The next project I started on while working on the knit blanket was a quilt top monogrammed blanket. They are super easy and are my standard gift for babies. This one I wanted to spice up by adding ruffled satin binding to the edges. I had never done that before and it was a pain to get all the ruffles even and the corners were really hard. I probably won't do that in the near future.

For the blanket I used 1 yard of quilt topped fabric and 1 1/4 yards of flannel. There is a specific kind of pre-quilted fabric I use that is just fabric on the top and the batting is exposed underneath. The places I have found it are at Hobby Lobby and Hancock Fabrics. Joann's has one that is similar but it has fabric on both sides. I bought it initially to try and see if it would work okay but it is horrible. It was so wrinkly and stiff after I washed it. It looked okay once ironed flat again but I knew this would not be practical for a baby blanket. I scrapped that and purchased the right fabric.

I cut out all the letters for her name with my Silhouette Cameo and then put fusible interfacing on the back of each letter. I attached all the letters and gathered the satin to fit the edges. I sewed it all down and flipped it right side out and top stitched close to all the edges.


I forgot to take a picture of the back before I gifted it but it is the same fabric as the letters.

Christmas Dress:

The week before Christmas I started working on my poinsettia dress. I got the fabric on sale at Joann's for 75% off with this dress in mind. I used the Simplicity 1459 pattern. I wanted a fuller skirt so instead of the suggested lining I just sewed two layers of the skirt together. This turned out to be a huge mistake and weighed the dress down considerably. I had to take in the shoulders and the side seams to fit my shape properly and this changed the arm holes of the dress. I have zero experience with fitted sleeves so instead of properly adjusting the pattern I decided to gather the tops to fit the smaller opening. It turned out cute but because of the collar you really can't see them. I also removed the zipper from the dress because it was easy enough to slip it over my head and the zipper was a pain with the double skirt.


I also sewed the bodice closed instead of just having the buttons hold it closed. I have a larger bust and so the side wouldn't lay flat. I also had to make my own belt since the pattern one didn't fit. I mean honestly. If I can fit into the pattern size and make the largest belt and that doesn't fit there is a problem. I feel like the belt was made up to a pattern size 16 and they forgot about the rest of the measurements.

An improvement I would make is to add belt loops to the dress to hold the belt in place. It kept riding up on me and I was constantly pulling it down.

January Wreath:

Finally January rolled around and all my Christmas sewing projects were done. I decided I would try my hand at making a January - March / Winter wreath for my front door. I have wreaths for all the other seasons and holidays except Winter. I wanted something really basic since not much grows during those months. I got an oval tightly packed twig wreath that had dead leaves squished in between. I saw these beautiful white flowers at Hobby Lobby and decided to add them too. Then I purchased an H and some long grass.

When I got home I painted the H and assembled everything with the glue gun. It was pretty easy and I love how it turned out.


Pillowcases:

At the end of January my nephew was having a birthday party. When I asked what he liked I was pleased to hear that he was watching the Star Wars show on TV. I had the perfect idea for a cute gift. I went to Hancock Fabrics first checked the remnants bin. Score. I found a yard each of Star Wars fabric. The one I liked best was black with glow in the dark white graphics of the space ships from the movies. I got some green and black Rebel Alliance fabric also so I could make two pillow cases that matched. I followed directions similar to these and they came out amazing and very professional looking as far as construction goes. I made one smaller since I wasn't sure if he had a child's pillow or an adult pillow. But they both fit a queen pillow fine.


That is pretty much all I have been able to work on the last six months. School was overwhelming this semester and so I had no free time to do/make anything.

The next post will be about restoring a broken Singer sewing box.

Thanks for reading!

Friday, February 6, 2015

Red Cloak Completed


So I finally got around to taking some pictures of my finished cape. I was down to the wire in finishing it. I hemmed it the night before the Renaissance Festival and finished at about 1 am. I wore that cape every time I went. It was just the right amount of fabric that it didn't get too hot when it was 75 degrees out but still kept me warm during cooler days.


The hood looks a little lopsided on the left because I had it tied behind my back instead of around my neck. I was wearing a wolf necklace that otherwise wouldn't have been seen. 

Here are some detailed pictures of the cloak. The picture on the right is of the boning channel that was sewn on and boned with a industrial zip tie. It keeps the hood open and out of my face. Just exactly what I wanted.


 This is a detailed picture of under the hood to show off all of the cartridge pleats.


We had a really great time. I loved how my cape went so well with my dress. This last picture is of me and my best friend. I made the dress she is wearing for myself a few years ago. It was the first time I had made any full costume attire and the first time I have ever made a corset.

Under my dress is a hoop skirt I also made. My underskirt material was really thin and so it showed through really badly. But it was fun to wear and kept my legs cool while walking around all day. It is made from the undergarment pattern, Simplicity 2621, for the Simplicity 2589 dress. I will hopefully have time to do a write up on it sometime soon but this semester has been pretty killer with homework so far.

The making of this cape can be read here!

Thank you for reading!

Thursday, November 13, 2014

Simplicity 4059 - Men's Doublet (View B)


I saved the best for last in this three part project for the Simplicity 4059 pattern. This was such a daunting task. It loomed over my head like a black cloud because the amount of details and little things I would have to add to this project.

I started with the main fabric and built on that. I didn't know what to make the lining color as. I had found a nice bottom weight fabric in burgundy that matched the binding/edges of my fancy dress we bought at the Renaissance Festival two years ago. I had planned on using it to make the binding of the doublet so they had some thread that held the two outfits together. I tried very hard to find some red color that would match the doublet. No place had it. I was so disappointed. I didn't trust buying it online because of how many times I have seen someone order something thinking it was one color but turned out to be another. So I gave up and used something that was similar to the contrast edges of my dress.

The three layers of fabric used for the doublet
Close up of the main fabric.

I loved how the fabric looks like little flames. I assume its a floral design but it looks so much like flames that I refer to it as "the flame doublet".

When I started cutting out the main fabric I finally decided that since I had gotten extra of the bottom weight fabric I'd use it as the lining as well as binding. Until then I had contemplated using red or black broadcloth I had in my stash. In the end I made a good choice because it gave the doublet more of the stiffness I wanted. I didn't want a floppy doublet. I felt like it would be too costumy and cheap feeling. 

I cut out the muslin first and fitted it. The small was a perfect fit for Charles. I used a fabric that was slightly thinner than canvas as the muslin. When putting the pieces together I decided that I wanted to use the muslin as another layer in the doublet to give it more stability and form. The above picture shows all three layers I used while making the flanges.   


I drew the lines on the muslin for fun just to see what it would look like. It looked pretty good. I unpinned everything and started working on some easy parts. I was super nervous to put it all together with my top fabric. I received this fabric via a windfall and only had just enough to finish this project and that was all. So I started with the flanges which were easy to put together. The three layers plus the interfacing made it the perfect stiffness. I set those aside and started working on the trim for the front and back of the doublet.


I took one inch wide strips of fabric and pressed the sides in to make a 1 cm wide strip. It was tedious since I don't have a bias machine thing. I sewed the back two pieces of the doublet outside and muslin together and marked, with chalk, the lines the bias tape was going to go on. I pinned all of the vertical pieces on first and then sewed them down. Then I added the horizontal piece. I did the same thing to the front doublet pieces after ironing on the interfacing.


For the lining I sewed the pieces together at the shoulders and the back seam. I almost wish that I had cut one piece on the fold for the back. It seemed silly to have the back in two pieces since you are supposed to sew them together first anyway. I thought maybe you were supposed to put the trim on and then sew the two back pieces together but it didn't say that in the directions.

Once I had the lining and outer layer put together I sewed on the flanges and put the lining together. Then I flipped everything right side out and pressed everything down.

The inside of the flange before side seams were connected.


I had some issues connecting the side seams. I have no idea why it was being bunchy and weird. Eventually I just got pissed and did the best I could. One side looks perfect while the other side puffs out a bit. Still hardly noticeable unless you were looking for it.

Once the side seams were done I started working on the peplum pieces. I attached them all without any problems and slip stitched the bottom of the lining closed. For the peplum pieces I decided to skip putting a border around each piece and the top actually looked the better for it. I had also decided to skip adding a middle piece on the top trim and thought it looked better as well. Less flashy than it would have looked had I added it.

Once it was all put together I just needed to add the grommets. I found some really nice bronze ones at Hobby Lobby. They looked perfect for the top instead of shiny gold or silver.

The finished product was lovely. It was a very easy patter and I would definitely make it again. 


The whole outfit looks great on him! He said it was very comfortable and he really liked it a lot. 

Below are links to the previous posts on this pattern:
The shirt
The pants