Thursday, September 15, 2016

Avengers Apron - Simplicity 3544

The past couple of months it has been hard to get into the office to sew. But I finally pushed myself and got this apron done!


I was super tired of constantly ruining shirts while cooking so I wanted an apron that would cover a lot of myself. I also really wanted to use a vintage pattern because well . . .  that's me. I had the avengers fabric for quite some time. I was initially going to make a dress or skirt out of it for the Avengers 2 premier and then, after waiting so long and not doing it, the Civil War premier. But that didn't work out and I needed an apron so this was born!

The instructions for this are fairly simple. I really didn't run into many problems besides issues with bias tape. Which I had to make a lot of! I could have purchased it and saved time but I wanted the tape to match the waist ties and buttons I was adding.


I started out by taking the front piece and making the dart for the pocket and ironing it down. The rounded bottom part will come together to make the pocket.

The pockets in this thing are awesome! I have a huge phone, the Note 4, and these pockets fit it perfectly.


The next thing I did was to add the pocket front piece to the large front sections. Then I added bias tape to the tops. 


Once those pieces are completed you can sew the pocket pieces together. I suggest using a serger or some kind of finishing stitch to the edges to keep fraying down. Maybe even use bias tape on the edges as a bound seam. This project will use A LOT of bias tape so buy or make extra! I chose to use my serger and serged the seams.

Below is what it will look like when the two pieces are sewn together.


Next is the center front. Use the bias tape to encase the neckline in bias tape. Don't fold in the edges. They will get caught up in side seams to get finished. 


 The next step will be to sew the side fronts to the center front. You will sew wrong sides together so that the seam is outside. Then trim it down by 1cm all the way up to the shoulder seam edge so you can put the bias tape over it. Make sure you are pressing everything regularly. You want to make sure everything is flat when you are laying the tape down.


Now it is time for the shoulder straps. I sewed them together with french seams. I didn't want any exposed seams on this because I knew this would be washed often and I didn't want the seams to shred. You can either use a serger or a finishing stitch. I do not recommend using bias tape for bound seams because it will create bulk for the edges when the trim goes on. 

I also sewed on the side back panels using my serger and ironed the seams towards the back. On the sides in the front, the edge just under the first scallop you will need to trim away 1cm from the edge all the way down to the side edge.

  
 The next step took the most time. I pinned on all the bias tape from the side all the way up and around the strap and down the center front seams. It took a lot of time to get the tape properly set in the corners of the scallops and over everything evenly. But I sewed them down and ironed them towards the center in the middle.


Now it was time to work on the ties. This part was super simple. The pattern calls for 1 piece of fabric to create the tie and then you make narrow hems the whole way around. I decided to modify this because I wanted the ties to look nicer. So I used 2 pieces and sewed them into a tube. Then I flipped it right side out and make sure the pointed ends were pointy and ironed it down. I top stitched the edges 1/8th away from the edge and then gathered the square ends. 


I basted the ties down onto the edges and then wrapped bias tape around the hem of the apron. 
Sewing the bias tape over the waist ties seemed to be the most difficult thing. The gathering created extra bulk that the 1/4 inch bias tape didn't want to handle while going through a machine. If I had laid it flat it would have worked. It might have been the extra layer in the tie, but I refuse to believe that. I had to sew and resew the section over and over. It looked terrible. Finally I just decided I would force it down with hand stitches and then top sew over it. So I sewed the edges down with invisible stitches and then ran it through the machine. Still not pleased because the fabric is visibly mangled a bit from the constant resewing but you can't see once its tied and buttoned. The rest of the hem looks great though!

I made button holes in the ends of the shoulder straps and covered some 1" buttons with the yellow fabric and sewed them onto the edges. It was finally finished!


And now for one picture with a petticoat under it as is tradition. Well at least EVERY picture I see of aprons always seem to have petticoats underneath. 


Thank you for reading! Happy sewing!

Thursday, August 27, 2015

Simplicity 1091 - Harley Quinn Corset


This corset pattern is similar in basic construction to the previous one I made for this pattern. This corset is in two pieces instead of three though.

I started by cutting out my fabric. I cut three layers of canvas for this corset. I wanted good structure in this corset and I highly recommend extra layers of fabric compared to the two you are supposed to cut out. Loriann Costume Designs, the original pattern maker, suggests three layers of cotton and one of canvas in her Joker corset walk through. The pattern package calls for one layer of outside fabric and one of canvas. I'm assuming it is to cut the fabric costs down for the casual costume maker.

I sewed the layers together for the outside and then the lining and ironed them out.


Then I pinned the two pieces with right sides together and sewed around the sides and upper edge. The corners and curves were clipped and the edges trimmed to 1/4".


I flipped the pieces right side out and pressed them flat and drew on the stitching lines for the boning. I regret waiting so long to do this. This corset loses a lot of the straightness by being sewn together and it makes it hard to transfer the lines. I suggest drawing on the lines after you cut out the pieces. At least for the printed stitching lines. Obviously you cannot draw on lines for the edges until after the piece has been sewn together.


Also, on Loriann's blog she shows her method of inserting the boning which I think is awesome and would never have thought of. I, however, lack the confidence to do it her way for this corset. However when I make a version of the 1095 corset I might go ahead and do it that way. I really like how her way doesn't require any bias tape on the edge of the corset.

Anyway, after all the lines were drawn on I stitched them in and started inserting the boning.


Once the boning was inserted I slipped the bias tape over the raw edge and sewed it down. Then I punched out the grommet holes and did a test fitting before I installed the actual grommets. After making sure everything was good I installed the grommets and it was complete!


The lacing is really wide in the back because my mannequin is larger than my friend is. I also made this a little smaller than her regular measurements because she works out quite a bit and I didn't want her to not be able to fit into the costume because she lost weight.

Also, the main changes that are different than the patter directions are:
-I used industrial zip ties that are a little bit smaller than 1/2" causing me to adjust the boning channels to be 1/2" wide.
-I used 5/16" grommets (the package calls for a wayyy bigger size)
-I didn't follow the directions for the bias tape. I just slipped it over the raw edge rather than their complicated way.
-I used three layers of canvas (outside, inside, and lining) instead of the one suggested for the lining.

I hope reading this has helped with preparing to make this costume. I always find blogs like these so incredibly helpful before I start on a project.

Here are the links to the previous pieces in this set:

Skirt, Bustle, & Top
Shrug

Have a great day!

Tuesday, August 18, 2015

Poison Ivy Leaf Pins


Finally this costume is 100% complete! The only thing I had left to do was to put some leaves on it so that it was more distinguishable as Poison Ivy. Instead of sewing on leaves I decided to make pins so that I could use parts of the costume for other costumes.


The materials for these include:
-Ivy leaves
-Green thread
-Sewing needle
-Pin backs, I used .75in. You could use a wider one if you wish.
-Hot glue gun and glue sticks
-Scissors


The first thing I did was to cut off all the plastic attaching the leaves together. I left the plastic that was glued to the leaves on. I did cut the plastic very close to the edge so that there was nothing sticking out from each individual leaf.


Then I took the leaves and made a random arrangement that I thought looked nice and piece by piece started tacking them down with tiny stitches. I could have hot glued them together but I've never had great luck with hot glue holding things down.

The fronts look like this:


While the backs look like this:


I sewed the pin backing on to hold it in place and then put hot glue over it to really cement it in place. This also covered the knotted end of the string keeping it from coming apart also. On large groups of leaves I did put some hot clue to keep the ends together since I didn't want the sewing tacks all over the place.


I continued using this method with a bunch more leaves. I made one large group and then some medium ones and a few singles. Eventually I had enough to pin them on the costume. 


I didn't put any on the sides so that my arm movements wouldn't knock them around and potentially rip them off. I also didn't put many on my back since I might be wearing my backpack and they wouldn't be seen anyway.

I will post some worn photos of this in October when we go to the festival. Same goes for my Harley Quinn costume.


Thanks for reading!!

Sunday, August 16, 2015

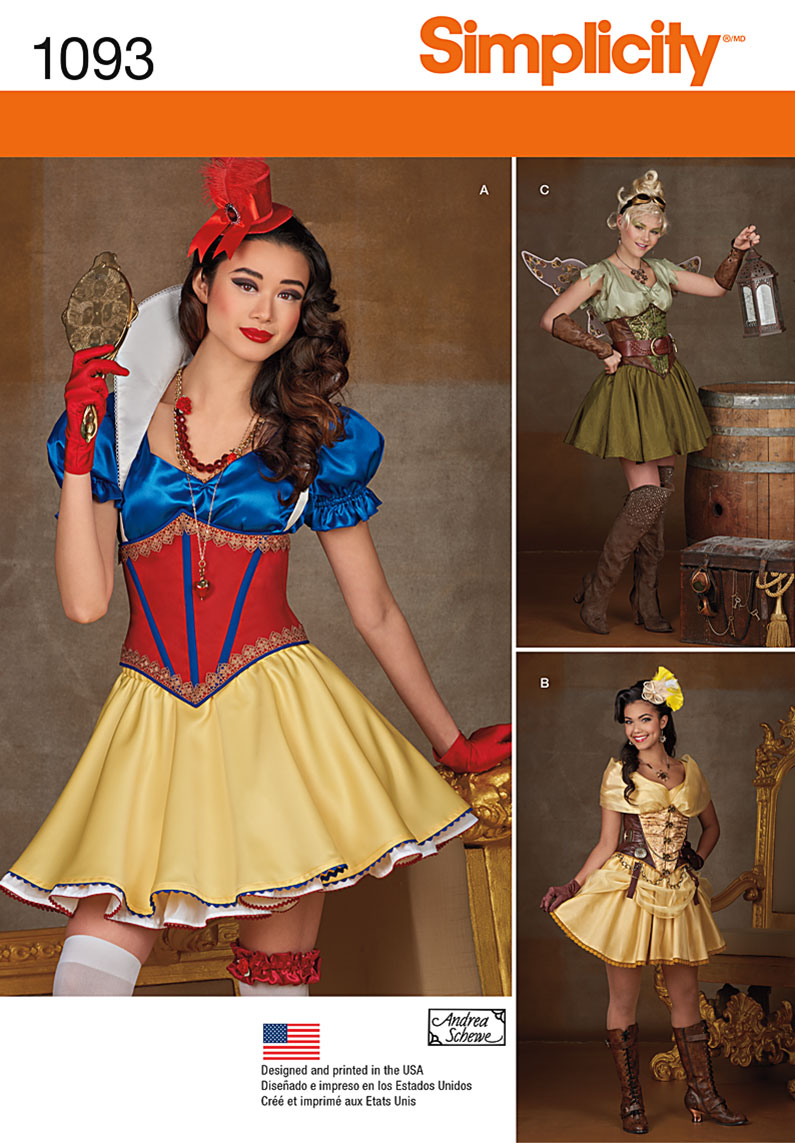
Simplicity 1093 - Snow White Shirt


The shirt for my Poison Ivy costume is finished! I had made a mock up of this in white and it looks really good with my costume but I think the green really pulls everything together.

This pattern is pretty easy to follow. The only thing I do not like is the neck facings. They wouldn't stay down and kept rolling up and showing. I tacked them down with a top stitch on the green version instead of doing the under stitch. The facings not staying flat might have been because I used a very stiff cotton on the white version.

If you make this in white I HIGHLY suggest adding two layers of the front piece. One layer is pretty see through so if you don't have something covering your breasts, or a bra on, people will see everything you got.

I modified the sleeve pattern to be six inches longer than the original. I don't like puffed up sleeves being that short. I like my biceps covered. I will explain my process for that later on.

The first thing I did was to stay stitch the arm holes, back collar, and shoulders.


The sides were then sewn up using French seams. Left the shoulders open for now so I could adjust them if the neckline was too low. On the first one I made I used the largest size to fit my bust but the neckline was too open. For this version I cut a size down for the neckline and shoulders but left the armholes and sides the original size.


A narrow hem was added to the bottom by folding it 1/2" and then 1/4" and sewing it down.


The shoulder seams were sewn together with French seams and ironed. 


Then I started working on the sleeves. I used the pattern and tracing paper to make a longer sleeve. At the arrows on the sides that show where to attach the sides together I drew a straight line. I also used my cutting mat to make sure the line was straight by lining up the arrow on the pattern.


I dragged the pattern piece down five inches making sure it lined up with my cutting mat and drew a line at 5 inches. 


Since the side seams are angled, to make the wide, gathered bottom edge, I used a ruler and drew a line out to each side so I could account for the change in width. 


Then with those drawn I lined up the pattern piece on each edge, matching where the red lines are in the picture above, and drew out the bottom and elastic placement line on each side and marked where they met in the middle. Now I had a new sleeve pattern.


Then cut out 1 1/2" strips of the fabric to make the elastic casing and fed it through my bias tape maker and ironed it. 


The casing was then pinned on the sleeve and sewn in place. 


I made a narrow hem, just like on the bottom of the shirt, on each sleeve.

Using my arm as a measurement, I cut the elastic to size. I fished it through the elastic casing and kept a pin on the end to keep it anchored while I gathered the fabric along the elastic. I basted both ends of elastic down close to the edge. 


Then I used French seams to join the edges.


I gathered the top edges between the marked lines and then sewed them onto the shirt. 


Now it was time for my least favorite part, the facings. I don't like them. I would have sewn this shirt with just two layers of fabric but I didn't have enough to cut out 4 top pieces. On the white shirt I made the facings where horrible. They didn't want to lie flat and when I put the shirt on they kept showing. Part of that was because I used such stiff fabric.

I cut them out and applied interfacing to them. Then I stitched them together using French seams.


 I ironed under a 1/4" on the outside of the facing and sewed it down.


I try to conserve the interfacing fabric as much as possible. Not because it's expensive or anything but because I don't see why I should throw chunks of it out when it can all be fused together. It's never seen and I've never had an issue from it being patched together.

I attached the facing to the collar of the shirt and stitched it down.


I cut notches in all the curves and then clipped the seam allowance down really close to the edge. This was because instead of under stitching I was going to top stitch. I tried it their way. It sucked and didn't do anything about keeping the facings tucked down. I have a couple of shirts from Target that I am planning to do this too because the facings keep coming out. It's very frustrating.

So I ironed the facing under and top stitched 1/8" away from the edge. It looks fine to me. Some people don't want to have the stitching line showing but it doesn't bother me at all. I also stitched the shoulder seams  to the facings to that they would stay pinned under there.


The last step was to gather the V point. I marked the spot where it was to start and then just fished a needle through with no specific length to the stitches. Then I gathered it down and tied it.


Here is the shirt with my Poison Ivy costume!


Thanks for reading!!